How to upcycle pine chairs
In this blog I show you how to upcycle pine chairs: WARNING it can take a long time! If you can’t see the video click here.
Upcycle pine chairs and other furniture – the sequel
This week I decided to stop putting off sorting out my kitchen pine chairs, as they’ve been bugging me on a daily basis.
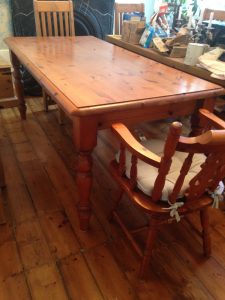
Now if you haven’t seen my blog on upcycling a pine table, it’s worth looking at that next as there is a story behind this table and chairs.
Basically it was all for free! I’ll link to it later.
It really feels like these chairs have been letting the kitchen down as TOWIE coloured pine is not the look I’m going for.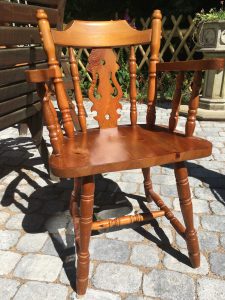
I must admit I wasn’t looking forward to this project quite like others. It was bound to be a lengthy and achy one.
I wasn’t even sure how long each one would take, which in itself makes a task seem more daunting.
Consequently I’d sat on this one for too long, but this week enough was enough! Pun totally intended of course.
I would like to have just stripped the chairs. Having battled with the table top, which I ended up sanding, I decided to take the easier route. The prospect of getting into the nooks and crannies of these was too much even for me.
Chalking it up
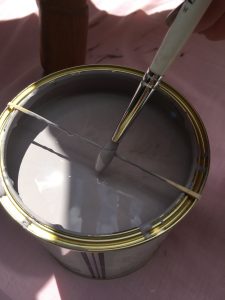
There I was reaching for the chalk paint once again. I decided I wanted to go for a slightly different grey because I didn’t want it to be too matchy matchy with the rest of the kitchen.
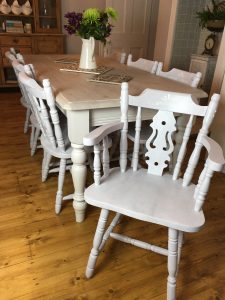
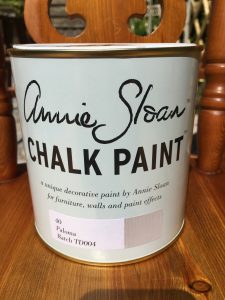 To achieve impact I went with Annie Sloan’s Paloma chalk paint which is a slightly deeper mauve grey than the kitchen colour scheme.
Now I’m not a lover of prep, but I have learned from my previous mistakes.
The one thing I will always do now before painting is sugar soap the item. This removes any grease allowing a smoother finish.
I’ve recently been to a couple of the Annie Sloan workshops held by Dovetails and have picked up some brilliant tips. One of these was a way of decorating spindles involving rubber gloves, socks and quite frankly phallic gestures!
I can totally recommend their courses, even if you are already experienced in upcycling. It’s a lot of fun but you are also bound to pick up ways to improve your art.
 Glove puppetry
 Glove puppetry
So to the gloves and socks. This was actually a tip for painting spindles, but I thought I’d use it to sugar soap them to start with.
You wear the gloves under the socks and although I usually find it easier to use sugar soap in a spray, this way you could pour directly onto the gloves.
You can then use both hands to wrap around two spindles at a time and rub up and down in a milking fashion. Now let’s be grown up about this and not make the obvious comment.
The flat bits are easy to then wipe, but be thorough – particularly with something like chairs, which have been in a greasy, high traffic environment. It took about three minutes per chair to clean.
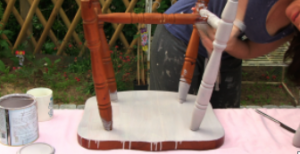
I decided to go with two coats of the Paloma. When doing chairs it’s best to elevate them as it prevents back-ache and is easier to attack.
For me personally, the socks made it harder to do, but one of Annie Sloan’s brushes is an absolute must for doing the spindles, it was just so much easier than a flat brush and works so well with her paint.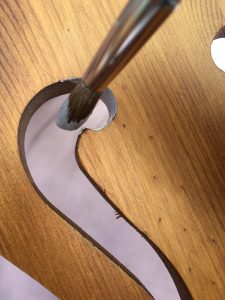
Inside out
I found I got into a good pattern with each chair by starting with painting inside the cut-out pattern – which took six minutes per chair.
Next I turned them upside down and painted the legs furthest away first and worked towards me.
By the time I’d done this with all 8 chairs the first was ready to do on the up-side.
 The first coat took 30 minutes per chair, with the second coat taking 20 minutes.
The best way I found to do the spindles was up and down and then around following the pattern.
Chalk paint tips
 A couple of tips I learned from the Annie Sloan course is to put an elastic band on the tin to remove any excess paint.
Normally we tend to do it against the edge of the tin which means you get a build-up around the top, which makes it harder to close.
Also the paint tends to then dry, because it’s closer to the air, and fall in the paint. Doing this should increase the longevity of the paint.
With a project like this, which takes a long time, you may find the paint starts to clog a little. Have a mug of water close-by which you just dip your brush in every so often before putting in the paint and you will find it runs a lot more smoothly.
Not enough faith in Paloma…
So having spent hours painting these chairs, I then decided Paloma was too mauve for my liking. At this stage I roped my husband in to help.
Please take a moment to spare a thought for my him and the pain he endures being married to me will you…
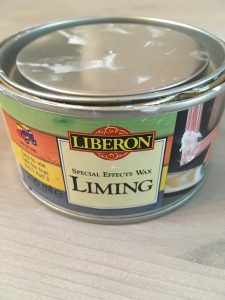 Anyway, this was quickly remedied by my favourite product of the year, Liberon’s Special Effects Liming Wax which I got from Brewers.
I just love the look you get from this stuff and using the socks trick this just took 10 minutes to do.
The result was a thrilled Georgina – priceless and hard to achieve!
Put your stamp on it
Now there must be thousands of these same chairs out there and anyone could decorate them like this.
In order to make them individual to me I also stencilled this decorative touch to the backs of the chairs to complement the tiles in my kitchen. This t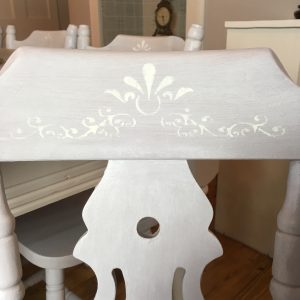 ook five minutes per chair.
If you have a family and you want to make the chairs fun, you could stencil your children’s names on them. Maybe you’re a dog lover so could paint some paw prints – whatever makes you smile on a daily basis!
If you get bored of them you could always paint over and do something different so the chairs grow with you through life.
It’s amazing the boost something like this can give you as it’s all about confirming your identity in a fun way.
As I’ve mentioned before, I’m not a fan of the buffed wax finish so instead I used the Ronseal White Ash Interior Wax. You seem to be able to get this from most DIY stores. I’d experimented with this when doing the table, and I love the flat finish it gives.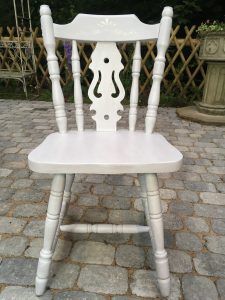
I actually did three coats of this as I know in my house there is likely to be a lot of wear and tear on these.
You could probably get away with two – particularly as the Liberon wax also protects.
Each coat of this took eight minutes.
13 hours to upcycle pine chairs!
So that was a gobsmacking 98 minutes to upcycle pine chairs, that’s 784 minutes or 13 hours for the 8 and I was exhausted!
I would suggest you don’t underestimate how long it will take to do a set of chairs like this. Also factor in the cost of your time as to whether it’s worth it.
For me it’s all about the individuality of them and of course because I didn’t pay for the set in the first place I felt like it was worth it.
I see my little family eating dinner, playing games and having lots of love and laughter around this table for many years to come. Hopefully they will appreciate my (oh and let’s not forget hubby’s) efforts!
So that’s how to upcycle pine chairs! If you haven’t seen the blog and video for the accompanying table it’s worth taking a look. Let’s see if you have the stamina to do a similar project – if so I want to see your before and afters!
For updates on my latest blog and video subscribe here for free by entering your email and confirming. Your details will never be passed on to anyone – I promise!!!
For daily posts and live demos come and chat with me on The Home Genie TV Facebook page.
upcycle pine chairs upcycle pine chairs upcycle pine chairs upcycle pine chairs upcycle pine chairs upcycle pine chairs – apologies for this repetition, apparently it is needed for good SEO!!!!
Well that was absolutely brilliant help! Oh how I wish I had known all that when I did my dining chairs. Never mind it’s in time for the kitchen ones. Thanks so much and keep them coming.
Well if you get bored of them in the future you can always give it a go – although if it took as long as mine once may be enough!
I love how you edit 12 hours work into 2 mins.. Lol.. Time-lapse is the way forward. Chairs are hard work. It’s diffenatly a labour of love.. But a great outcome.. Well done.
Thank you. you know what the editing process of these videos can be just as frustrating at times! Imagine if I could fast forward the actual painting process!
Love these instructional videos relating to the pine table and chairs and very helpful to me with my own project – a similarly hideous ‘orange’ pine dresser! I think I am going to do the top like your table top and the rest like the table legs. Here’s hoping it looks as good as yours!
Oh I so want to se your before and afters. Just make sure you put aside enough time – very frustrating if you don’t, and so much more enjoyable if you over estimate how long it will take – I can only imagine as I never seem to do!
Love the elastic band tip – something I’d never thought of!
Can’t take credit for that – agree a great tip and definitely made a difference.