

Hobbycraft marbling kit demo
This is my Hobbycraft marbling kit demo. If you can’t view the video, please click here.

Marbling in Florence
I managed to sneak in a weekend in Florence last year and one of my favourite experiences was watching a paper marbling expert at work.
It’s one of the most mesmerizing things to watch and I came back with all sorts of marbled stuff!

What I love is the randomness of it and that no piece is going to be the same as another.
I think this is the perfect project to do to calm you down during lockdown or over a weekend if, like me, you’re trying to work and home-school at the same time.
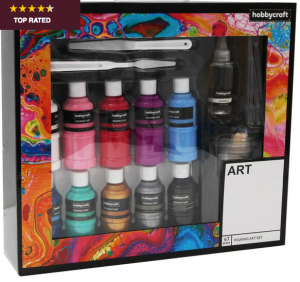
Hobbycraft kit for beginners and beyond
I must point out that the way I’ve done this is very much entry level for beginners. I’ll share more techniques with you as I try them.

So what I used was :
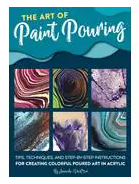
I can also recommend the book The Art of Paint Pouring, which demonstrates various marbling techniques. Even if you never try marbling out, it’s a lush book to look at!
How to guide

Oh and don’t forget to protect the table and your clothes!
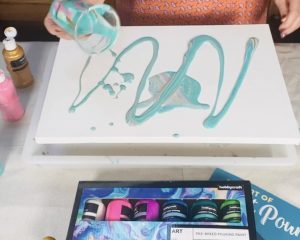
I used premixed pouring acrylic but if yours is too thick you will need to add a pouring medium.
You may also want to water the paint down but the more you dilute it, the less defined the pattern will be.
It can be a bit of trial and error to get the perfect consistency. Importantly, if you add too much water you may find it cracks when dried though.
Now pour this mixture onto the canvas as randomly as you like.
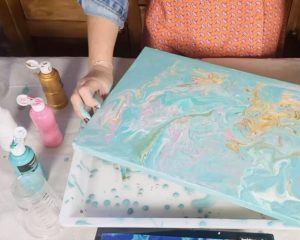
Once the paint is on there, it’s a case of moving the canvas around to create the marbling pattern.
You need to be patient with this bit!
Make sure the paint is covering the edges as well. I was a bit naughty and used my fingers in places, which spoiled the patterning a bit.


If you’re unhappy with any of the patterns just add more paint.
Make sure you leave it flat to dry thoroughly. This may take a while but the pattern will keep forming, so it’s really exciting to come back and see how it’s turned out!
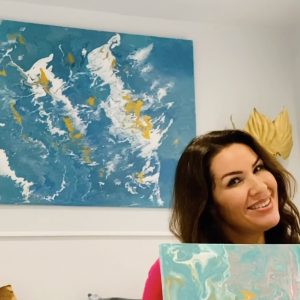
I have to say I was pleasantly surprised so I even went large with my marbling experiment to create this wall art.

Next time I’ll try silicone and other techniques, so watch this space!
Now it’s your turn! I want to see your masterpieces please!
If you want to try something completely different – how about making a designer cushion from an old shirt? Here is my guide.
Please do write your comments below. I’d love to answer any questions you have, hear your feedback or any advice you have to offer my readers!
Why not subscribe for free so you never miss a post or video?
Please come be social and I’ll give you daily updates of what I’m up to. Find me on Instagram, Linkedin, Twitter and on The Home Genie TV Facebook page.