How to make a cushion cover out of a designer shirt
This is my post on how to make a cushion cover out of a designer shirt. If you can’t see the video please click here.
Stop the press!
Did you know that Ted Baker make cushions?
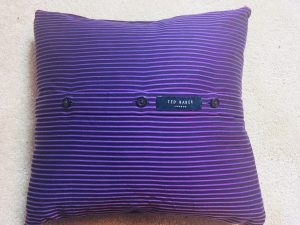 Well you can certainly get hold of one now as I’m going to show you how to make a cushion out of an old designer shirt – or any shirt for that matter.
This is definitely the most easy peasy way to create one too. It’s so quick and simple I even sewed it by hand and it took just half an hour.
If I’d used a machine it probably would have only taken 10 minutes.
 Here we go
- First remove the label using a seam ripper or small scissors.
2. Next measure the cushion inner you will be using.
Buy the inner first, by the way, because sometimes the measurements can differ marginally.
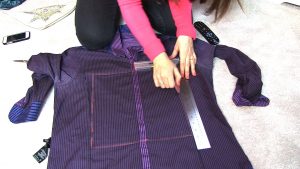 3. Start with an ironed shirt and turn it inside out.
4. Next you draw the shape of the cushion with dressmaker’s chalk. This can be bought from any haberdashery or online.
Depending on the colour of the fabric, you could also use pencil or crayon. Blackboard chalk doesn’t give you a sharp enough line though.
If you’re desperate an eye-liner pencil will do!
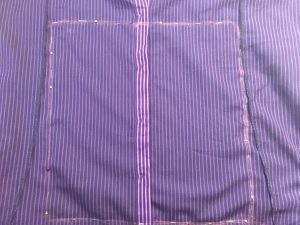 5. Continue by pinning the front and back of the shirt together around the chalked line.
It’s important there is no bunching here – so it’s worth taking your time over this step.
You can have the buttons down the centre, off-centre, or even diagonally. This is where you can put your own stamp on it!
6. Cut around the chalked shape, leaving space for a 2cm seam. It’s also worth snipping the corners off diagonally as well, but not too close to your chalk line – best to leave at least half a centimetre.
 Sew easy!!!
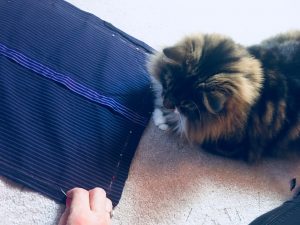
7. Now sew around the shape of the cushion. This is a matter of a few minutes with a machine, but is still very quick and easy by hand whilst you’re watching Eastenders!
It really helps if you have a cat about to pounce on you whilst doing this bit…
8. Unbutton it and turn the right way around and push out the corners.
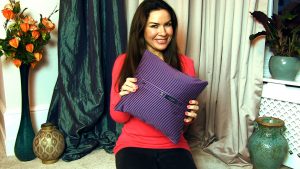 9. If you wish, you can sew the label back on as a feature. This can go anywhere as long as you can still open the cushion – obvs!
10. And finally, put your cushion inner inside and do up your buttons.
And that’s how to make a cushion cover out of a shirt. How easy was that?!!!
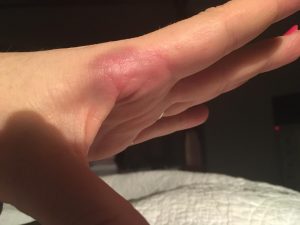 Well yes it is very simple… and safe… in theory… yet I still managed to prick a vein, causing this injury!
Permission granted to laugh at my misfortune.
What I love about this idea is that if you have a piece of clothing you love, you don’t want to throw it away do you – even if the armpits have gone a bit funky?!
This way you can keep it as a momento (minus the pits!).
After all, interiors should always evoke the right feelings, as I explain in my post about the psychology of colour.
Please leave a comment to let me know what you think and when you make your own cushion I’d love to see a picture.
Why not subscribe for free so you never miss a post or video?
For daily posts and live demos come and chat with me on The Home Genie TV Facebook page.
 Here we go
 Sew easy!!!
Hi Georgina
This is great for making cushions out of favourite shirts that were worn by our late loved ones who have just passed on. A great comfort to their family left behind. There are companies that do this but you have just made it look really easy! Thank you.
Theresa xx
Oh and now you have me crying! Thanks Theresa, what a beautiful idea. Clothes are so personal that it’s a truly great way to remember a loved one x
It is a great idea. To be able to snuggle into it would bring great comfort x
Good idea 🙂 . And with the size of my shirts could make a duvet cover :/
ha – worth considering!
Hi there
I saw you for the very first time yesterday on This Morning ” and loved your recycled book coffee table ,since watching you yesterday I have been to my favourite charity shop. ” came back with 12 hard back books and also got a heavy round marble top !! Right now my husband is searching for a large round tray he will also make a base for it ” but I have forgotten how to do it can you help me please?? I use Annie Sloan frequently,I have an old cottage and love up cycled pieces despite being partially sited ,hope you can help x
Just seen this comment as well Eleanor. You tape the pages together (just on the inside of the hard cover) with use picture framing tape or artist’s tape (it should match the colour of the pages so you don’t really see it). Then you glue the top cover to the inside and the bottom cover to the inside. Then glue on top of each other, fanning out but making sure there’s always a centre of gravity. I would glue one at a time and wait to dry before doing the next (I used wood glue) as they slide about a bit otherwise. Weight it down to dry. Then add the top. If you wanted the pattern on the books you need to decoupage the patterned paper to the spine. If you have the tools you could drill through all the books and place a rod through it, but it’s not totally necessary, just makes it more secure. Would love to hear how you get on.
I am trying to do your up cycled book table loved what you did on This Morning despite being partially sited and in my 70 s I love to be surrounded by colour ” thank you for brightening my day .
That’s so lovely to hear, glad you enjoyed it – how has yours gone? x
[…] try something completely different – how about making a designer cushion from an old shirt? Here is my […]
[…] This tutorial by Georgina Burnett guides us through turning an old shirt into a cushion cover. We’ll start by washing and ironing the shirt as you would any fabric for a sewing project. […]