Decorating tips from The Home Genie
This is my post on decorating tips. The video was taken from a Facebook live chat, so you need to be logged into Facebook to view it.
It’s good to share
 One of the things I love about doing the weekly live chat on Facebook is that I learn so much from you guys. I’m obviously hoping that I can pass on some of the advice I have picked up over the years, but every week I learn something new from you as well.
The latest theme was decorating tips, as I’ve had a number of people ask for advice recently.
The following list is obviously not exhaustive and doesn’t go into technique at all, but should hopefully get you off to a good start.
I will go into more detail in a future post on where to start when you have a brush in your hand and a bare wall staring back at you!
In fact, maybe that post should start with ‘how to remove woodchip paper!’ as that’s been the prep required each time for me!
Now these are mainly decorating tips relating to painting, although I did stray into other DIY matters during the chat!
1. White paint isn’t white paint
Well it is of course, but what I mean is don’t expect to be able to do touch-ups using another brand of white paint, as they will differ.
For this reason it makes sense to use the same brand throughout your house. Before long you will end up needing to refresh it so it makes life easier.
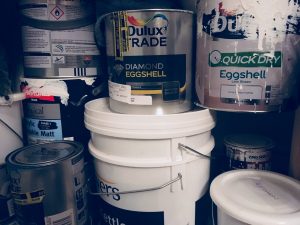 I had decorators in to do my most recent house, as I was having a baby. Unfortunately they must have used about seven different brands and even types of paint.
I now have a cupboard full of random tins.
2. Keep a list
When you are in the midst of decorating your house, you probably know the fancy name of every single colour. You might even dream about it!
But you would be surprised how even six months later you’re asking “was it called ‘Elephant’s Breath’ or ‘Monkey Burps’?”
Keep a list and email it to yourself for future reference. You may want to repaint in years to come, or even use the same colour again in your next home.
3. Any old emulsion will not do
I’m always one for keeping to a budget, but sometimes it pays to splash out initially. Although it costs a little more, using endurance paint in every room and the hallways will be worth it.
 You will find it lasts longer and doesn’t mark as easily, so your walls will stay looking fresh for longer.
4. Use a kettle
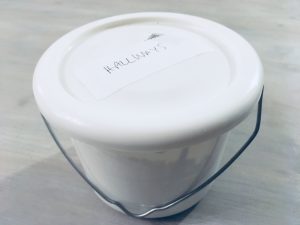
For tea? Absolutely, and regularly. But also decant your paint into a decorator’s kettle. It keeps your paint tin fresher for longer and is easier to carry around the house.
I always get mine from Brewers but they are available from most DIY retailers.
You can also use these to put small amounts of paint aside for touch-ups so you don’t have to store the large tins.
Remember paint does go off though, so this isn’t a long-term solution. You will know when it’s past its best as it will start smelling like a cat’s bottom…and looking like what comes out of a cat’s bottom.
 5. The elastic band trick
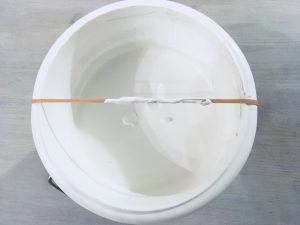
I learned this one on an Annie Sloan upcycling workshop. If you put an elastic band over your tin or kettle you can use it to remove excess paint from your brush.
This prevents a build-up of dried paint around the top of the tin. That helps the lid to fit better, prolonging the lifespan of the paint, but it also means you don’t get dried bits falling in and ruining the texture.
6. Use the right brush
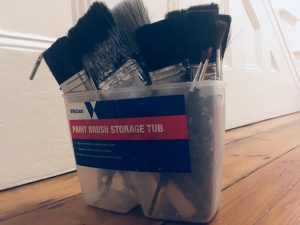 This sounds obvious, but it’s tempting just to use the brush you have to hand.
By investing in decent ones, suitable for the paint and the area/surface you are decorating, you will save yourself time and will most definitely get a better finish as well.
7. Save time on cleaning brushes
I hate cleaning brushes. It really is the last thing I want to do when I’ve finished a job.
It is a necessary chore that has to be done well if you want to look after your brushes though.
 The good news is you don’t have to necessarily do it in between coats. Instead, put it in a plastic bag, making it as air-tight as possible.
One of The Home Genie followers Stuart Terris also mentioned during the Facebook live chat that he uses cling-film, which is a great idea so thanks for that.
You can’t leave it like this for days though. I know that from bitter experience!
8. It’s all in the prep
Again there is a lot more involved with prepping your surface than I will go into now, but this is key.
Don’t think you can hide lumps, bumps and cracks by just painting over them. Trust me they will be even more noticeable!!!
9. Sock it to the spindles!
So many people have asked me for decorating tips for painting spindles, I feel this is definitely worth a mention.
You can get special painting gloves, but you can just use old socks to do them as well.
Simply put them on your hands and dip into paint! You will probably want to use a brush to finish them off though.
 10. Remember paint gets everywhere!
And by that, I mean EVERYWHERE! So cover everything.
Remember unless you are using plastic backed dust sheets that paint will still find a way through to your floor! By the way, Doug the builder told us in the live chat he uses these (because he’s a pro!).
I tend to use polythene sheets under cotton sheets which I buy from charity shops. I find the polythene ones on their own move and any breeze will see them sticking to your paintwork so the cotton sheets on top help to weigh them down. Nicola Ash said in the live chat she also does this.
I also find I can use the plastic sheets multiple times this way and I just bung the cotton sheets in the wash.
Self-adhesive carpet protector is brilliant as well, but a little on the expensive side and tricky to apply.
I often wear a plastic cap on my head to protect my hair! Seriously!
Hopefully some of these decorating tips will point you in the right direction, but feel free to ask more in the comments section. If you have any to add – they will be very welcome as well!
If it’s the colour you can’t decide upon, check out the advice The Great Interior Design Challenge’s Sophie Robinson gave when I chatted with her.
Don’t forget you don’t always have to decorate to add colour to a room – see what I did in my kitchen.
Why not subscribe for free so you never miss a post or video?
For daily posts and live demos come and chat with me on The Home Genie TV Facebook page.

 5. The elastic band trick
 10. Remember paint gets everywhere!
Another couple of tips:
1. Prep, prep and prep. Painting is the easy part but make sure you have all the materials to hand and fill any holes and cracks.
2. For sharp edges around skirting and ceilings use “frog tape”. It doesn’t bleed like masking tape. Use the yellow low tack one.
3. For painting with oil based paint like gloss or doorstep paint, buy a cheap brush and throw it away when done. It’s not worth trying to clean it.
Thanks for the mention too.
Brilliant tips, thanks so much Stuart. You know I will always say let’s find another way of using that brush though rather than throwing it away…maybe build a decorative wall of old brushes!!!
Thats a good idea! Its certainly better for the environment and cheaper than using lots of brush cleaner
less smelly too!
To protect light fittings whilst painting ceilings (obviously, you’ll have removed the lampshades and any other fancy stuff first!), cut a slit from the edge of a paper plate, plus a small hole in the centre the size of the cable. Slot the plate over the light fixing while you’re painting.
If you’re having to paint when it’s not daylight, at least you can leave a light on in the room this way too.
Oops. That should have said from the edge of the plate to the centre.
Thanks Julie – that’s a great tip!
[…] necessarily something you will be able to do as a surprise but it’s amazing the difference a lick of paint can do to a room. Use light colours for the ceiling and work your way down to the floor by using […]