Ad. How to paint a shed
This is my post on how to paint a shed. If you can’t see the video click here.
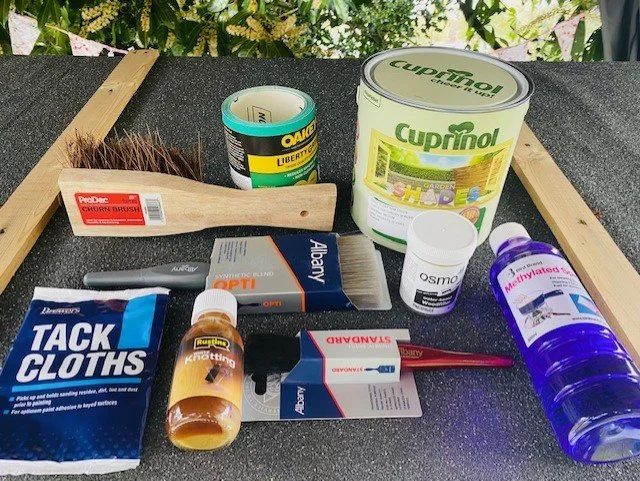
What you need to paint a shed
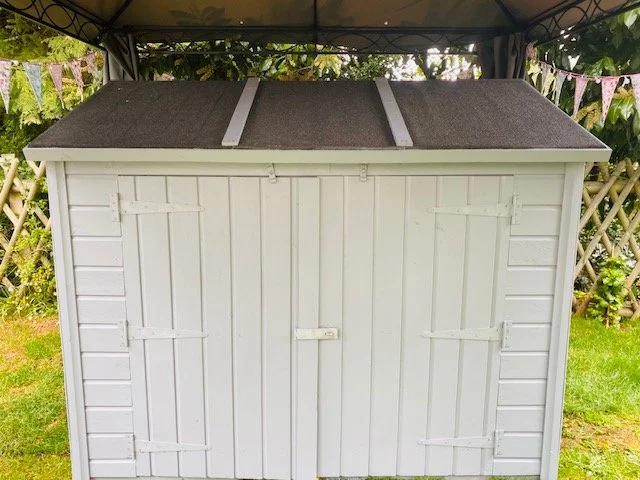
Finally I’ve got a little shed to store away all those annoying garden bits! I wanted it to go with the rest of my garden furniture so I decided to paint it grey - of course.
I always think a shed looks better painted so I thought I'd give you a guide on how to paint yours.
Firstly, before you reach for the paintbrush there’s plenty to do I'm afraid! All the products I'm mentioning are available from your local Brewers Decorator Centre, by the way.
Sand it
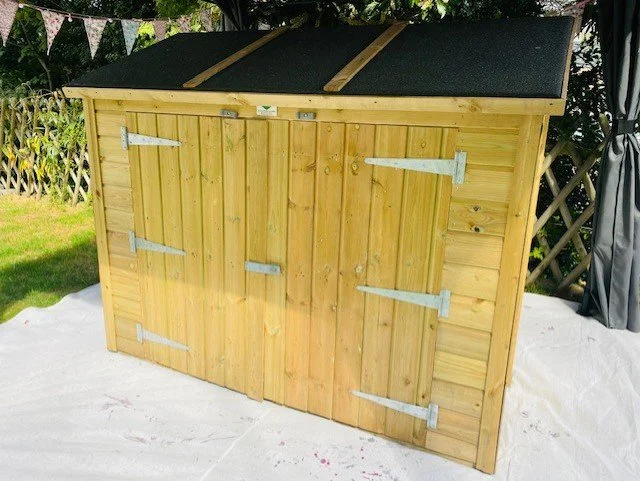
The prep you do will depend on the type of wood. This shed was smooth planed so it needed sanding down to remove rough surfaces. I’m used 120 grit sandpaper.
This one was new, but if yours has previous coatings in a poor state you will want to bring it back.
Also, if it’s rough sawn you will want to remove any loose material with a stiff brush.
Remove any dust from sanding with a tack cloth or brush.
Remember your PPE for all stages!If there’s any contamination, neutralise or remove with a cleaner such as methylated spirit and a stiff brush and allow it to dry.
Fill your shed with love (and good quality filler!)
Fill any minor holes and imperfections with a good quality wood filler, as close to the colour of the timber as possible.I used Osmo Wood Filler, which you can order in from your local Brewers.
A damp cloth around the edges can help to save time later for a neater finish.
If your finish is translucent though, avoid filling large areas as they may be visible through the coating.
Sand to blend with the surrounding timber and remove any dust as before.
Knot it!
If you’re using a traditional paint system you’ll need to apply knotting solution to any knots in the timber.
I actually didn't need to because I went for Cuprinol Garden Shades. It's translucent so allows the pattern of the wood to show through and also for any resin to release from the knots without damaging the coating.
If any residue comes through just remove it with a solvent like meths and a cloth.
Paint it - yay, the fun bit!
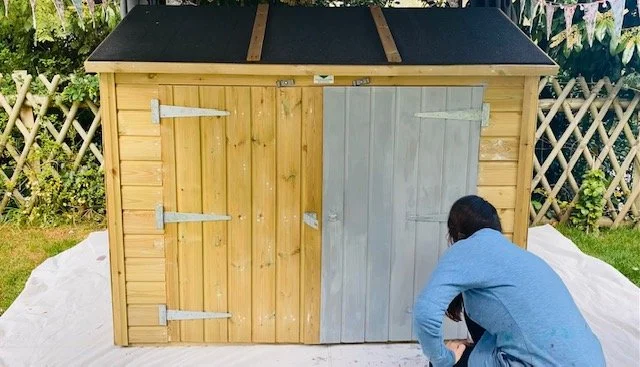
Anyway, on with my favourite part - the painting!
Give it a good stir before and during the process to make sure you get a consistent sheen and colour.
You need to apply these products in dry conditions, by the way, with a temperature above 10 degrees, so check the forecast!
When painting, pay attention to end grain, tops and bottoms of doors and undersides of sills.
If you’d prefer to protect and enhance the wood of your shed, in just one coat then use something like Ronseal One Coat Fence Life – which, despite the name, isn’t just for fences by the way.
It’s quick to use as it only needs one coat and comes in a variety of natural colours.
There you go, it’s all done! And finally the sunshine is coming out to play so I might actually be able to sit in the garden and admire it!
If you want to paint interior furniture, check out my post and video on upcycling a desk.
Please do write your comments below. I'd love to answer any questions you have, hear your feedback or any advice you have to offer my readers!
Why not subscribe for free so you never miss a post or video?
Please come be social and I'll give you daily updates of what I'm up to.
Find me on Instagram, Linkedin, Twitter and on The Home Genie TV Facebook page.
Instagram @burnett_georgina
Twitter @georginaburnett
Facebook @TheHomeGenieTV
Tik Tok TVGeorginaBurnett